Just outside of the small town of Lone Pine lies one of the best places to learn Landscape Photography. Heading west at the only stoplight in town is Whitney Portal Road which leads you to a web of dirt roads. The most popular is Movie Road. From here you can see the rust colored rock of the Alabama Hills with the gray granite Eastern Sierra in the background. I went several times on my own, but then I attended one of Don Gale's workshops there. Don taught me what photography is all about. How to follow the light.
Don schedules his workshops here during the winter months. The mountains face directly east. In the winter the sun is farther south and gives the scene a bit of side lighting. So here's Don's shooting strategy.

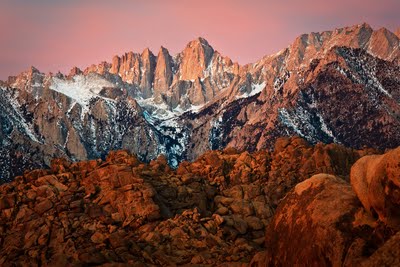
1) Arrive before Sunrise and shoot into the pre-dawn light using the silhouettes of the Alabama Hills as one element and the sky as another. Some days you'll see stars and some days you'll have clouds. You can shoot right from Whitney Portal Road. You'll want to arrive about 45 minutes before Sunrise. Spend about 15 minutes here.

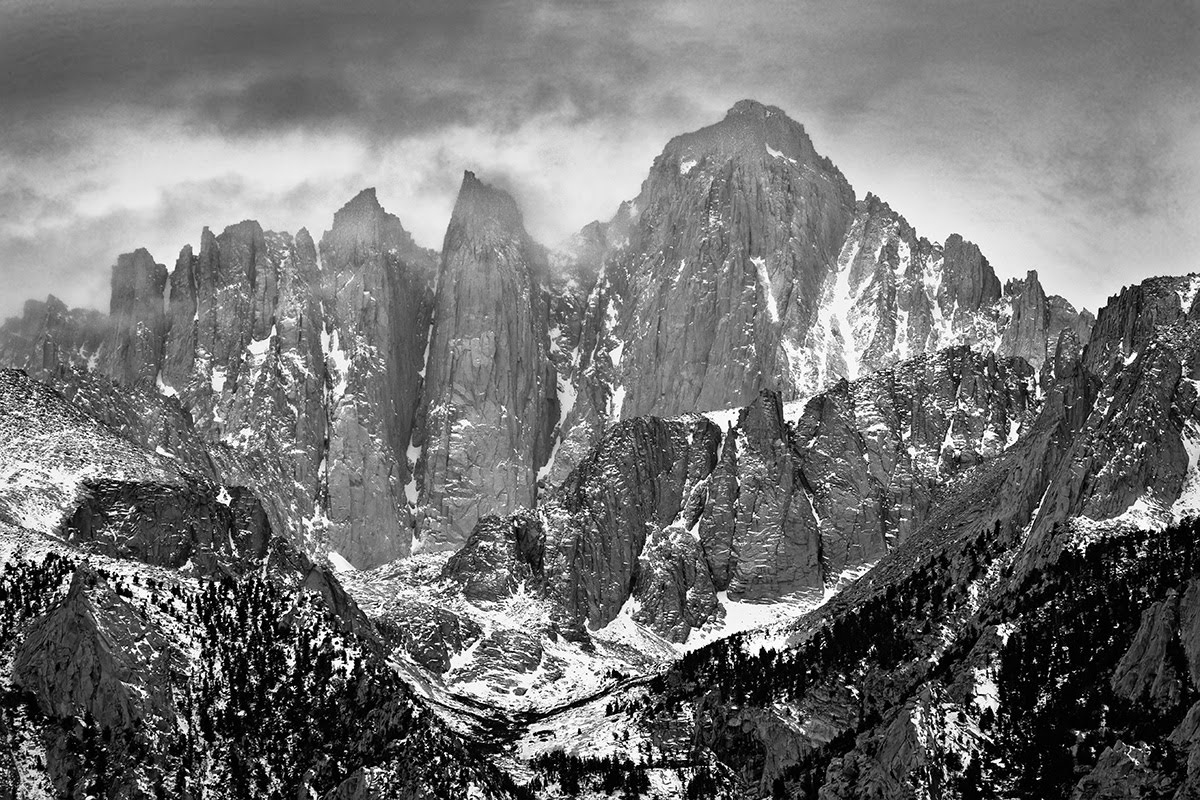
2) Then go north along Movie Road until you have some nice rock formations in the foreground and a clear site of Mt Whitney. The first rays of light will hit the top of tallest peak, which is Mt. Whitney. With a long lens isolate just the peak. Everyday is different but often you'll see the peak turn red. This is known as Alpenglow. A polarizer will help to darken the sky. If it's overcast you might try shooting in black and white.
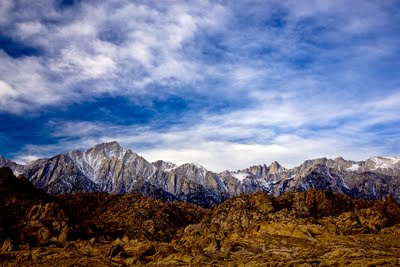
3) Just as the light begins to spill over into valley you can begin to shoot wide. You may need a split neutral density filter for a few minutes. Then as the sun hits the valley look for rock fromations to fill the foreground with Mt Whitney in the background.
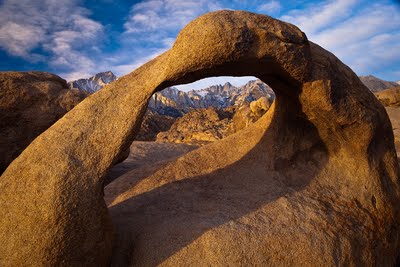
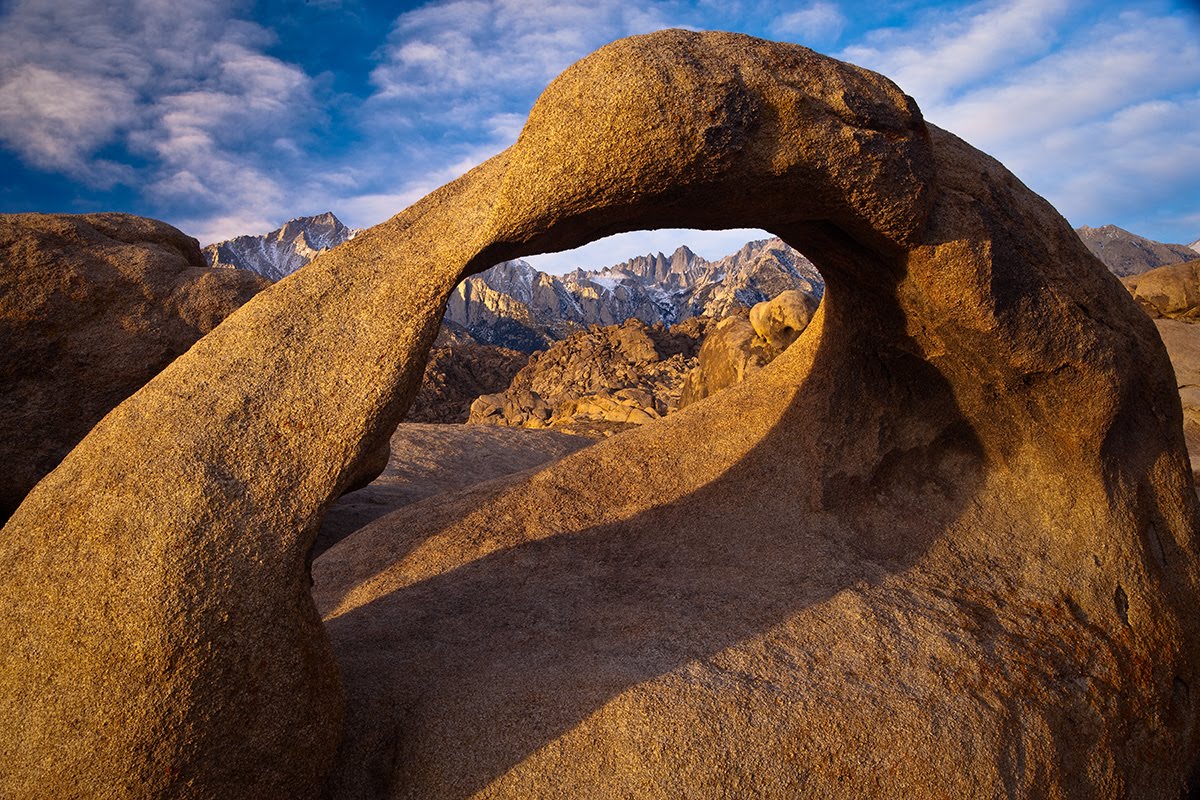
4) In recent years I've added Mobius Arch. There's a large dirt parking area along Movie Road and a well marked path to guide you. Clouds really help out here as the light can get contrasty if you wait too long. Just a few feet away is Lathe Arch.
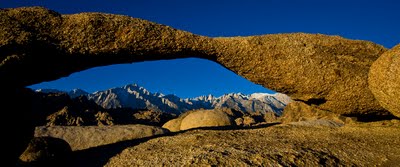
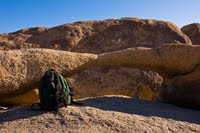
As you can see here, my backpack is leaning up against Lathe Arch. This was taken from the front of the arch. It appears much larger using an ultra wide lens from the backside. I'm using a 17mm on a full frame camera. Watch your step as their is nothing below your feet. You have to brace yourself between two rocks. Again, if you want the Arch and the Mountains to have light on them, timing becomes critical. I sometimes shoot before sunrise so everything is evenly lit, but my favorite shots are just as the first light hits Mobius Arch.
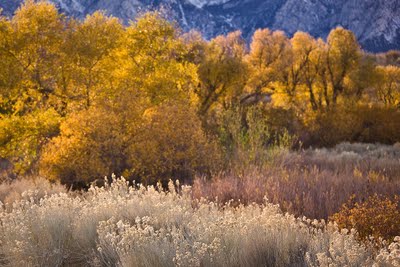
5) In the Afternoon the sun goes down behind mountains. At sunset they'll be in silhouette. You might try Lubken Canyon Road just across from the RV park. In late afternoon you'll find Cottonwoods in shade with the granite mountains providing a blue backdrop. A little earlier and you'll find them backlit. If you're there late fall you''ll find the cottonwoods have turn to a beautiful shade of yellow. Perfect for the blue backdrop.
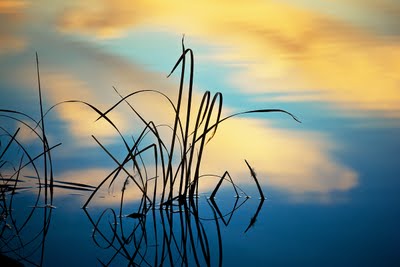
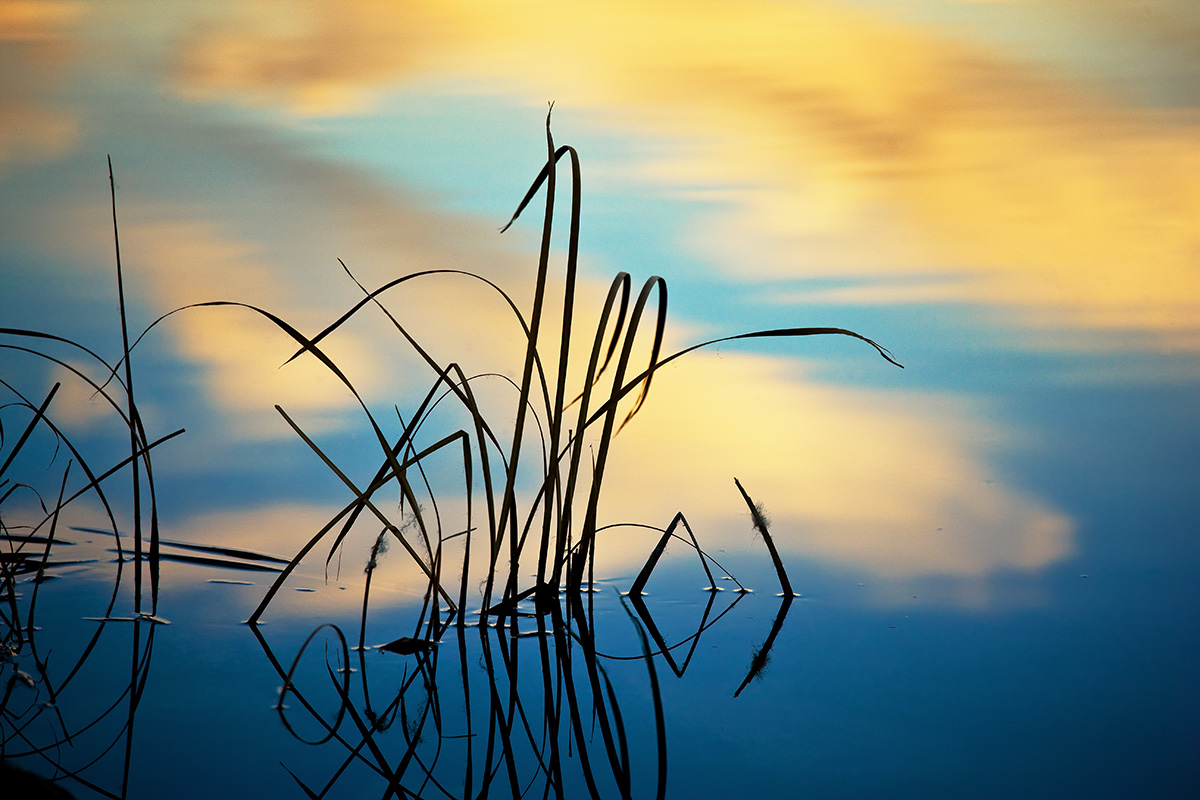
6) Then as the sun sets I like to look for reflections in the Owens River. There's a dirt road just on the other side of the RV park that goes to the pumping station. You can follow it along side of the Owens River. Walk along the banks as the sun begins to set and you'll find red mountain peaks or sunlit clouds reflectiing in the water. The rocks and reeds can add a zen like quality.

Again, Don's strategy is to always let the light dictate where you're going to shoot. You need to anticipate what the light is going to provide. I use this technique on every trip.Where will the Sun come up? Is there a break in the terrain that will let the last bit of light peek through? Can I move to the shadow side to make the scene more three dimensional. Each place provdes different answers but it's always the same question, "Where's the light?". And of course, "What's for lunch?".
Labels: California, Changing Light, Lone Pine, Stock Photography
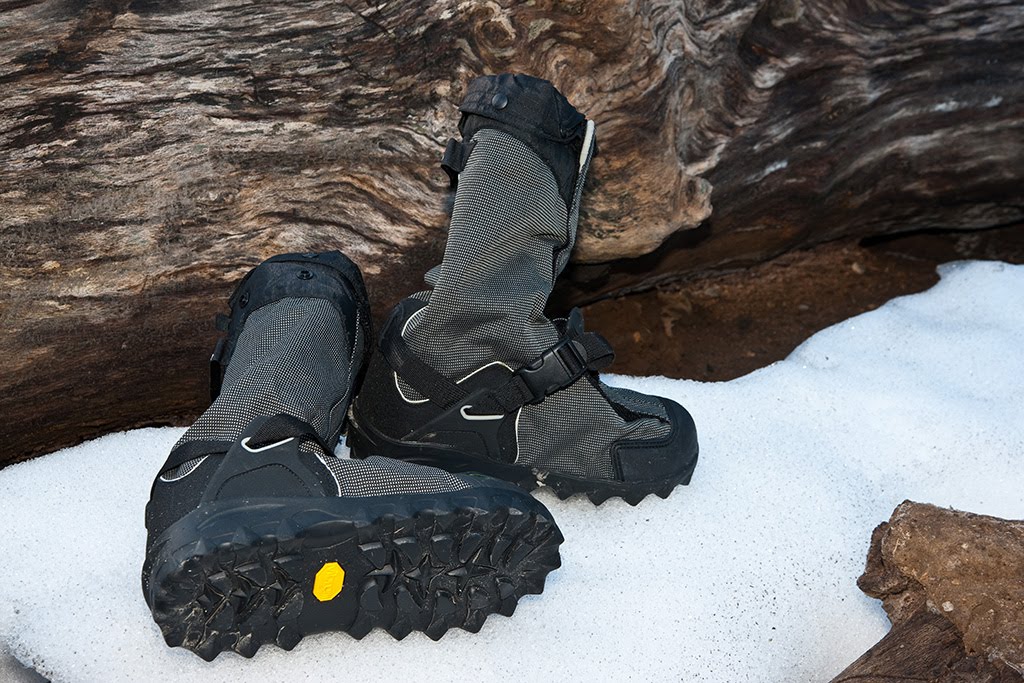 When Overshoes Online asked me to review a pair of their overshoes, little did they know that I had just come back from a trip where my feet got wet every day. I picked the NEOS Navigator 5 Overshoe. As the name implies they slip over your shoes. The NEOS Navigator 5 Overshoe is 15 inches high and extends to 20 inches. They are 100% waterproof and extremely well made.
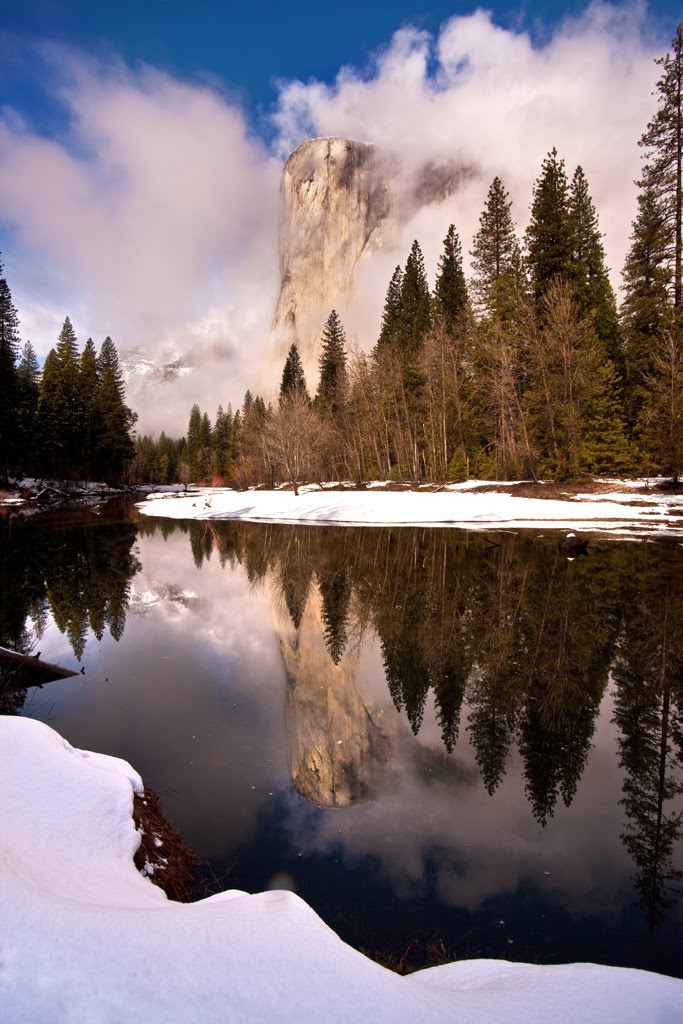 I tried them out during the fall but I wanted to trek through some snow before I gave a full review. I can now say Wow! The NEOS Navigators are warm and comfortable. As a photographer I'm often standing around, waiting for that magic light. The overshoes are like wearing slippers.